(4)Deploying a Complete Set of Web Services on EC2 via Docker Compose
The previous article has already introduced how to install Docker and Docker Compose. This article will explain how to deploy a complete set of web services.
1、Creating a New Directory in EC2
Log in to ec2 using termius, then create the directory structure shown below using the mkdir command.
(The paths mentioned in this article and subsequent chapters are based on this directory structure)
(This is just a hypothetical directory structure, you can build your own directory structure according to your ideas)
app
// Store backend project
app/backend
// Store nginx configs
app/nginx
// Store spa project
app/frontend
// Store ssr project
app/ssr
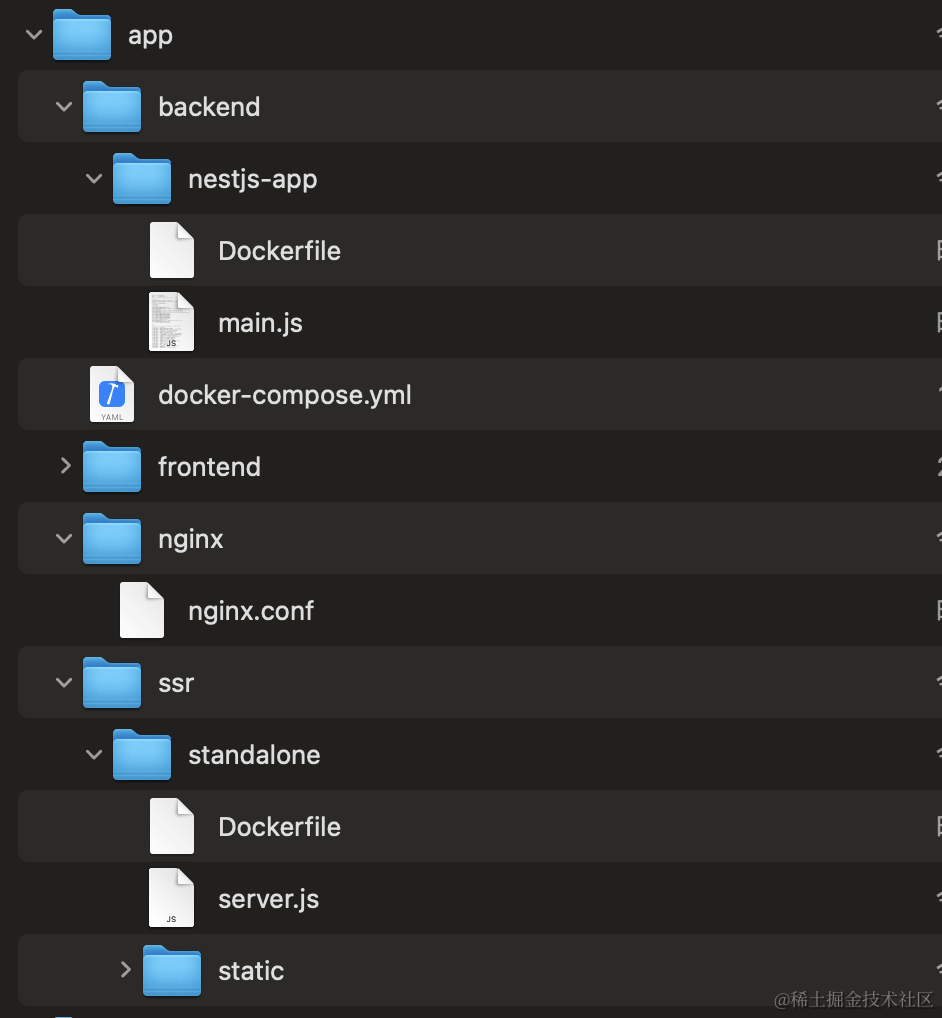
As can be seen from the image above, the /app/backend/nestjs-app directory is used to store NestJS-related resources, and the /app/ssr/standalone directory is used to store Next.js-related resources. Both directories have a Dockerfile, and the path of this Dockerfile corresponds to the build property in the docker-compose.yml below.
Running the docker-compose up command will build containers based on their Dockerfiles.
version: '3.1'

services:
  # mysql server
  db:
    image: mysql
    command: --default-authentication-plugin=mysql_native_password
    restart: always
    environment:
      # mysql password
      MYSQL_ROOT_PASSWORD: 123456
    ports:
      # exposed port:The left side is the port exposed to the external network,
      # and the right side is the port of the docker container.
      - "3306:3306"
    volumes:
      # Associate the mysql of the docker container with the server's disk.
      # The purpose of this is to protect the mysql data.
      # When the container dies, the data is still saved in the server.
      - /data/mysql:/var/lib/mysql
    labels:
      important: "true"
    restart: always

  # redis server
  redis:
    image: redis:latest
    container_name: myredis
    ports:
      - "6379:6379"
    command: redis-server --requirepass 123456
    labels:
      important: "true"

  # nestjs server
  nestjs-app:
    # This path is the build path of my nestjs service.
    # When running docker-compose up, docker will find the Dockerfile of the nestjs-app service to create the container from this path.
    build: ./backend/nest-blog
    ports:
      - "3008:3008"
    environment:
      NODE_ENV: production
    restart: always

  # nextjs server
  ssr:
    build:
      context: ./ssr/standalone
    restart: always
2、Writing Dockerfiles for NestJS and Next.js
2.1、Based on the first article, we have already packaged the /nest-blog/main.js source file. Now we need to create a Dockerfile in the /nest-blog directory.
# Node.js image
FROM node:20


# set work dir
WORKDIR /usr/src/app


# copy package.json and package-lock.json
COPY package*.json ./


# install pm2 to start server
RUN npm install pm2 -g


# copy all local file to docker pod
COPY . .


# This port must correspond to the port of docker-compose
EXPOSE 3008


# start server by pm2

# CMD ["pm2", "start", "./main.js"]
2.2、Based on the "How to Build Next.js" article, we have packaged a standalone source code directory. Since most of the work has been done during the build period, the Dockerfile newly created under standalone is very simple.
# Use the official Node.js 16 image as the base image
FROM node:20-alpine AS builder

# Set the working directory
WORKDIR /usr/src/app

COPY . .

# Expose port 3000,This port must correspond to the port of docker-compose
EXPOSE 3000

CMD ["node", "./server.js"]
3、Running the docker-compose Command on the EC2 Server
Enter the app directory on ec2 and run the command:
cd app
docker-compose up
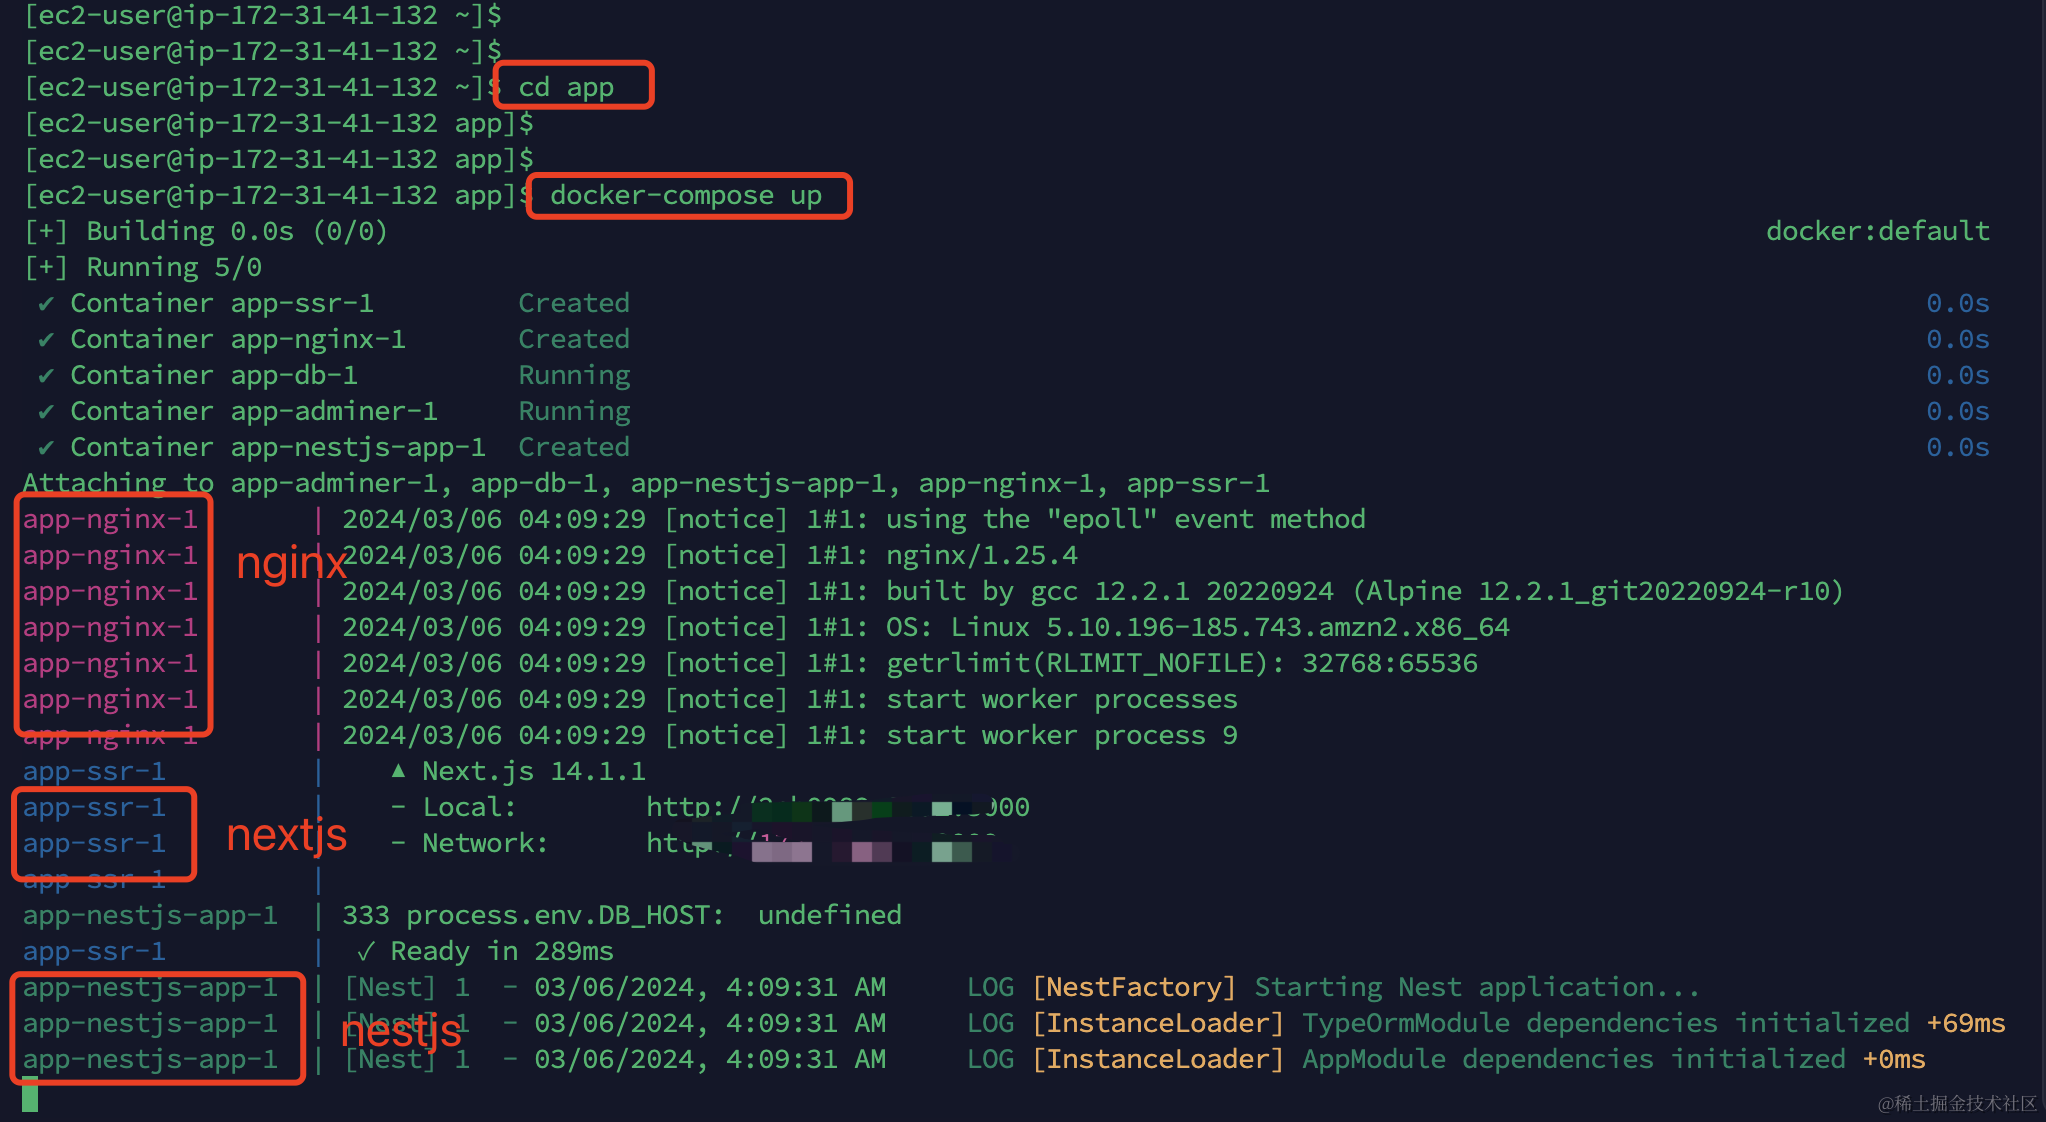
By now, Docker has completed the deployment of NestJS, Next.js, MySQL, Redis, etc.
Next: How to Forward NestJS Requests and Host Next.js Static Resources Through Nginx