(6) How to Use Git Actions for CI/CD Automated Deployment.
What is Automated Deployment?
Without CI/CD, if you need to deploy code to a server, you need to manually execute the following steps:
1、Connect to the server via SSH
2、Upload the code to the server
3、Run scripts to start the service
For complex projects, there may be more steps involved.
However, most companies have an automated deployment platform, which is a CI/CD platform. You only need to push your code to the repository. After completing a code review among team members and having a leader merge your feature into the master branch, a series of operations, such as running regression test scripts, will be executed, and the deployment will be completed automatically. In other words, you only need to push your code.
How to Implement CI/CD with Git Actions?
First, create a .github/workflows/deploy.yml file in the root directory of your project.
1、When code from the master branch is pushed and merged, execute the jobs.
deploy.yml content:
name: Deploy to EC2
on:
  push: # push action
    branches:
      - master  # adjust this to your main branch if it's named differently
2、Jobs (using a frontend project deployment as an example)
jobs:
  deploy:
    runs-on: ubuntu-latest # ubuntu server

    steps:
    - name: Checkout code
      uses: actions/checkout@v3 # Use this plugin to cut out branch code

    - name: Setup Node.js
      uses: actions/setup-node@v3
      with:
        node-version: 20  # adjust this to your project's node version
3、Install dependencies, compile, and package the project.
- name: Install dependencies and build
  run: |
    npm i pnpm -g
    pnpm i --no-lockfile
    pnpm build
4、Use appleboy/scp-action@master to upload the built artifact dist to /home/ec2-user/app on the server.
- name: Copy files to EC2
  uses: appleboy/scp-action@master
  with:
    host: 32.343.45.233 # server host
    username: root-test # server name
    key: 123456789 # server secret key
    source: ./dist/*  # the resource need to upload
    target: '/home/ec2-user/app' # server target folder
5、Use appleboy/ssh-action@master to run script commands on the server.
After your code is uploaded to the server, you often need to execute commands to restart the service. This plugin is used for this purpose.
- name: shell EC2
  uses: appleboy/ssh-action@master
  with:
    host: 32.343.45.233 # server host
    username: root-test # server name
    key: 123456789 # server secret key
    script: | # your script command
      cd /home/ec2-user/app
      docker-compose up --no-deps --build -d ssr
      docker image prune -a --force --filter "label!=important"
      docker system prune -a -f
6、Use GitHub Actions environment variables to hide sensitive information.
The server host and server key are sensitive information. For security reasons, they should not be written in plain text in the YAML file. Instead, we can represent them using environment variables.
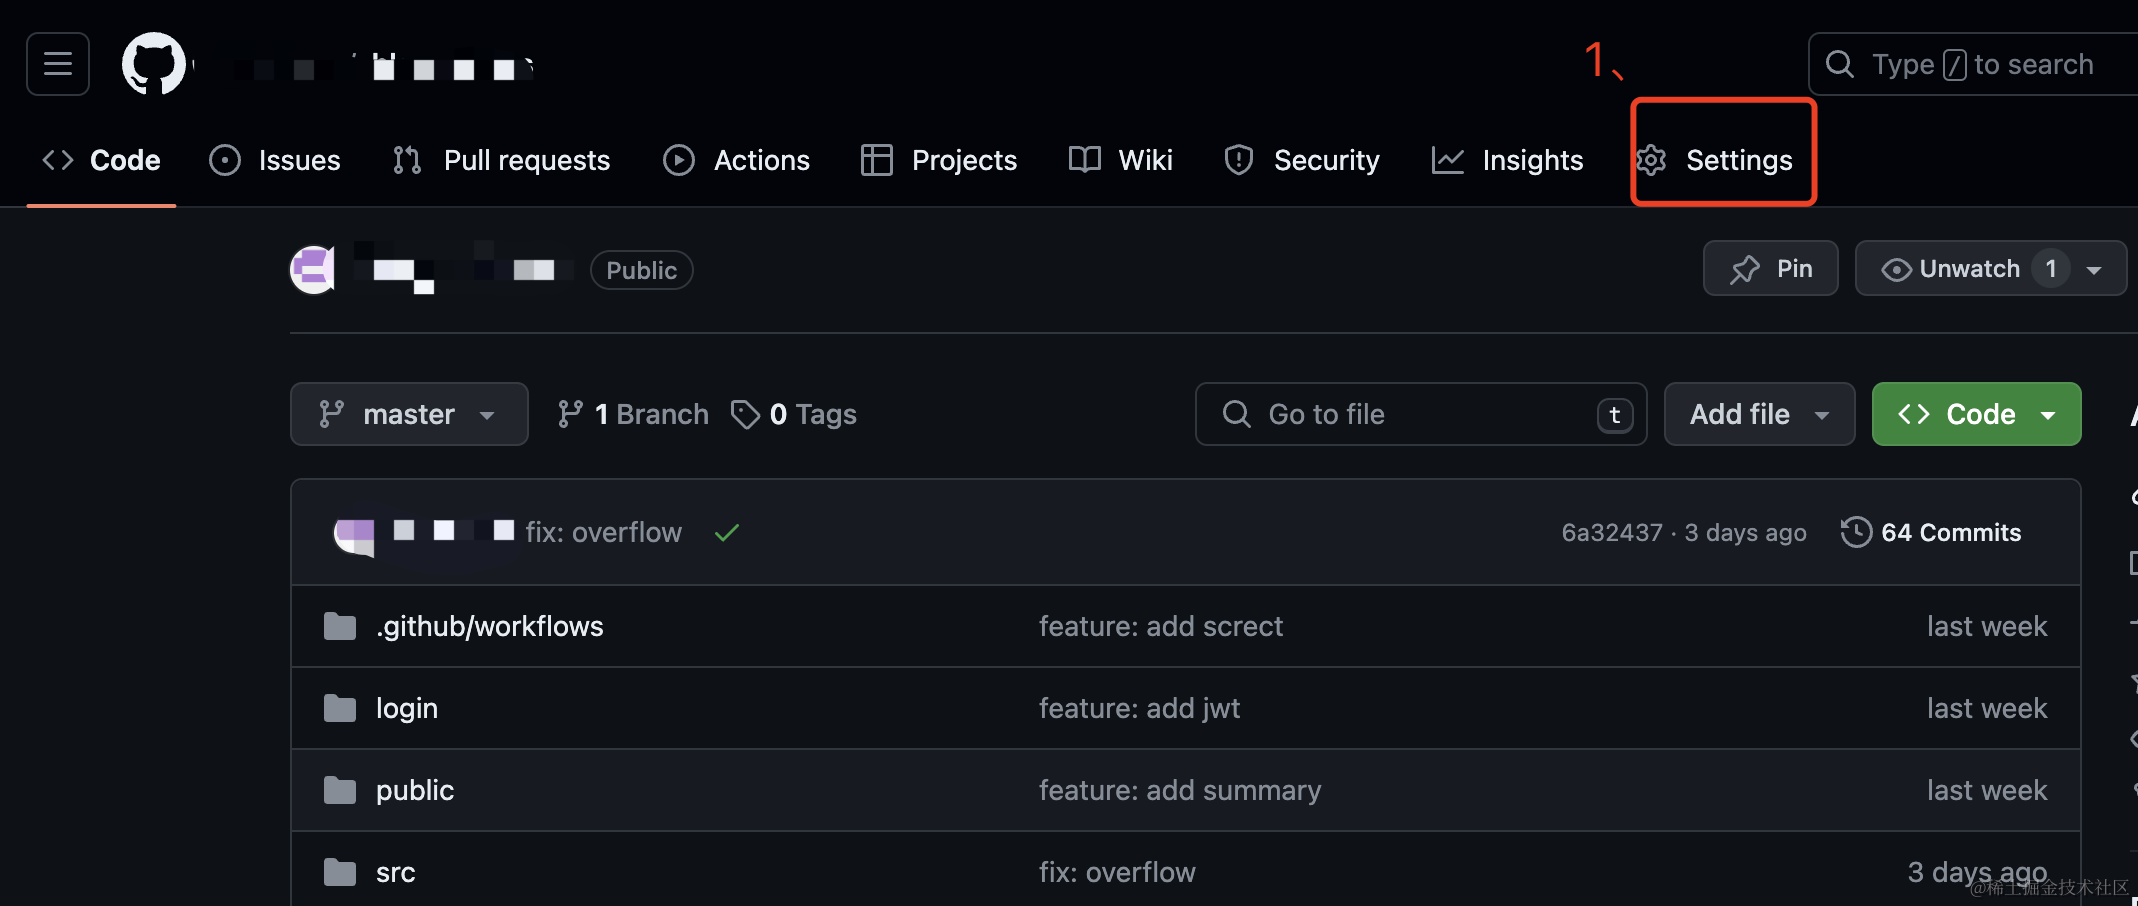
6.1、Go to your GitHub project, click on Settings.
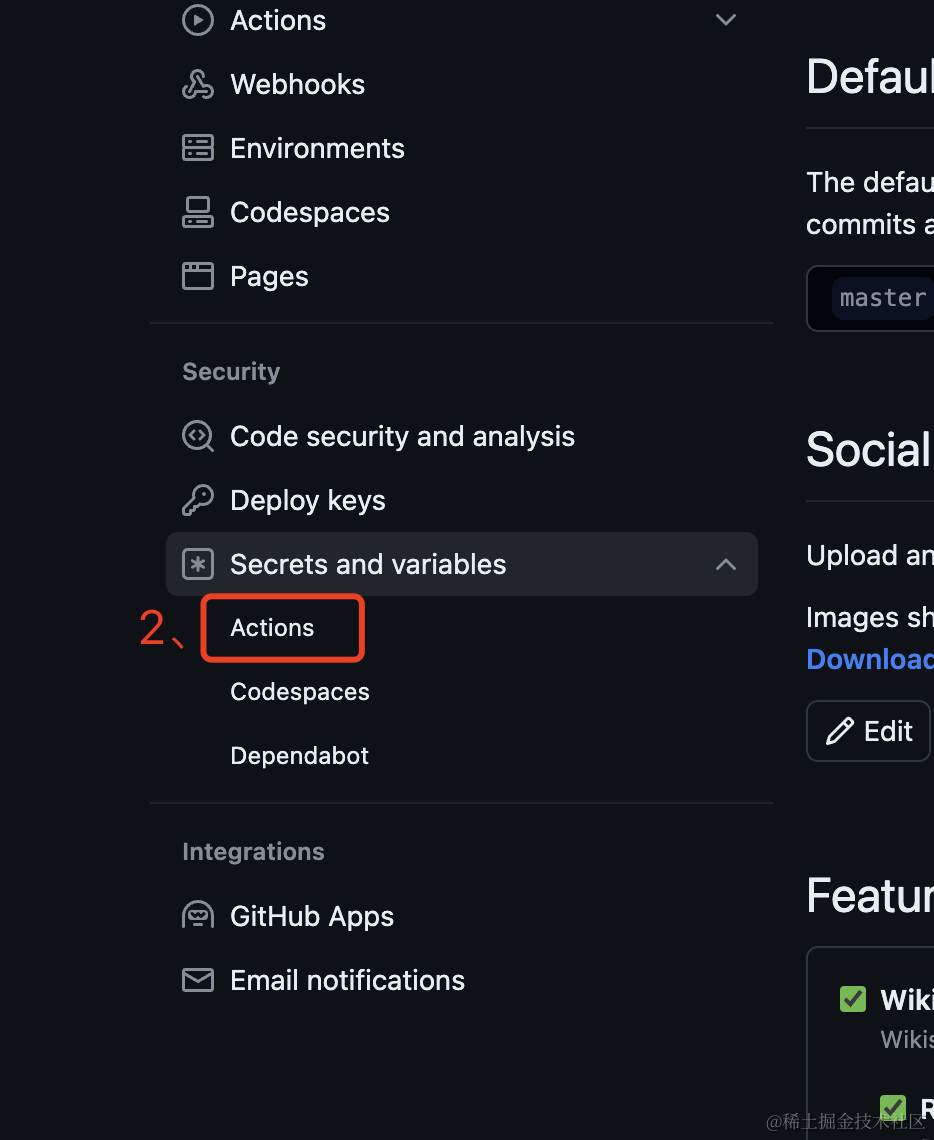
6.2、Click on Secrets and variables -> Actions.
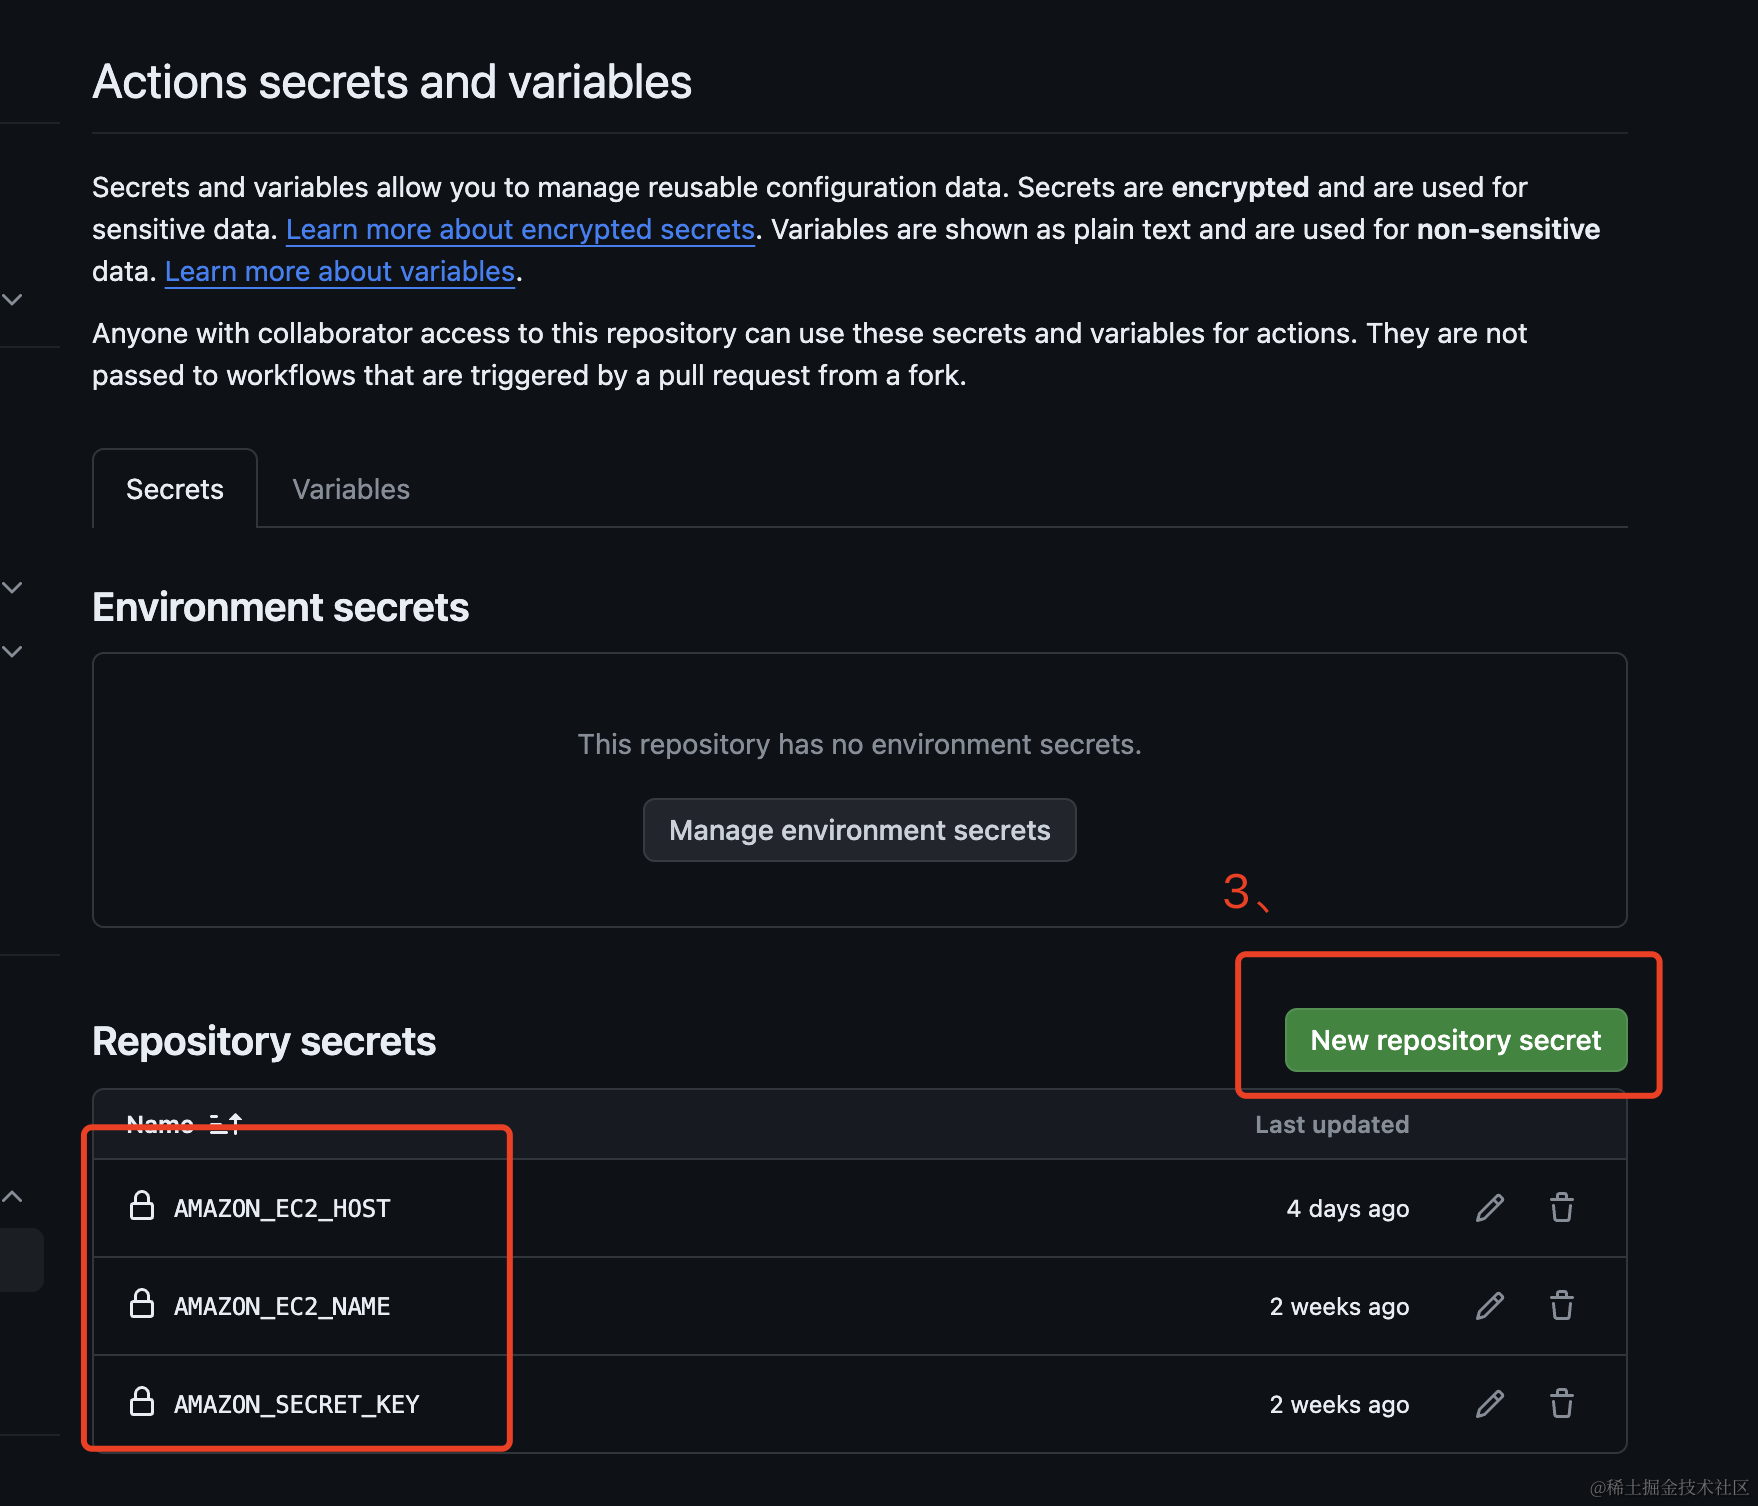
6.3、Click on New repository secret to create a variable.
6.4、 Use it in the YAML file.
- name: shell EC2
  uses: appleboy/ssh-action@master
  with:
    host: ${{ secrets.AMAZON_EC2_HOST }}
    username: ${{ secrets.AMAZON_EC2_NAME }}
    key: ${{ secrets.AMAZON_SECRET_KEY }}
    script: |
      cd /home/ec2-user/app
      docker-compose up --no-deps --build -d ssr
      docker image prune -a --force --filter "label!=important"
      docker system prune -a -f
7、Complete YAML file
(note that this configuration is tailored to my own project, you may need to make slight modifications based on your own needs).
name: Deploy to EC2
on:
  push:
    branches:
      - master  # adjust this to your main branch if it's named differently

jobs:
  deploy:
    runs-on: ubuntu-latest

    steps:
    - name: Checkout code
      uses: actions/checkout@v3

    - name: Setup Node.js
      uses: actions/setup-node@v3
      with:
        node-version: 20  # adjust this to your project's node version

    - name: Install dependencies and build
      run: |
        npm i pnpm -g
        pnpm i --no-lockfile
        npm run build

    - name: Copy standalone directory to a temporary directory
      run: |
        cp -r ./.next/standalone ./standalone
        cp -r ./.next/static ./standalone/.next/
        cp -r ./public ./standalone/
        cp -r ./Dockerfile ./standalone/

    - name: Copy files to EC2
      uses: appleboy/scp-action@master
      with:
        host: ${{ secrets.AMAZON_EC2_HOST }}
        username: ${{ secrets.AMAZON_EC2_NAME }}
        key: ${{ secrets.AMAZON_SECRET_KEY }}
        source: ./dist/*
        target: '/home/ec2-user/app'

    - name: shell EC2
      uses: appleboy/ssh-action@master
      with:
        host: ${{ secrets.AMAZON_EC2_HOST }}
        username: ${{ secrets.AMAZON_EC2_NAME }}
        key: ${{ secrets.AMAZON_SECRET_KEY }}
        script: |
          cd /home/ec2-user/app
          docker-compose up --no-deps --build -d ssr
          docker image prune -a --force --filter "label!=important"
          docker system prune -a -f
Now, all you need to do is push your code to the remote repository, and Git Actions will automatically execute the scripts in deploy.yml to complete the automated deployment.
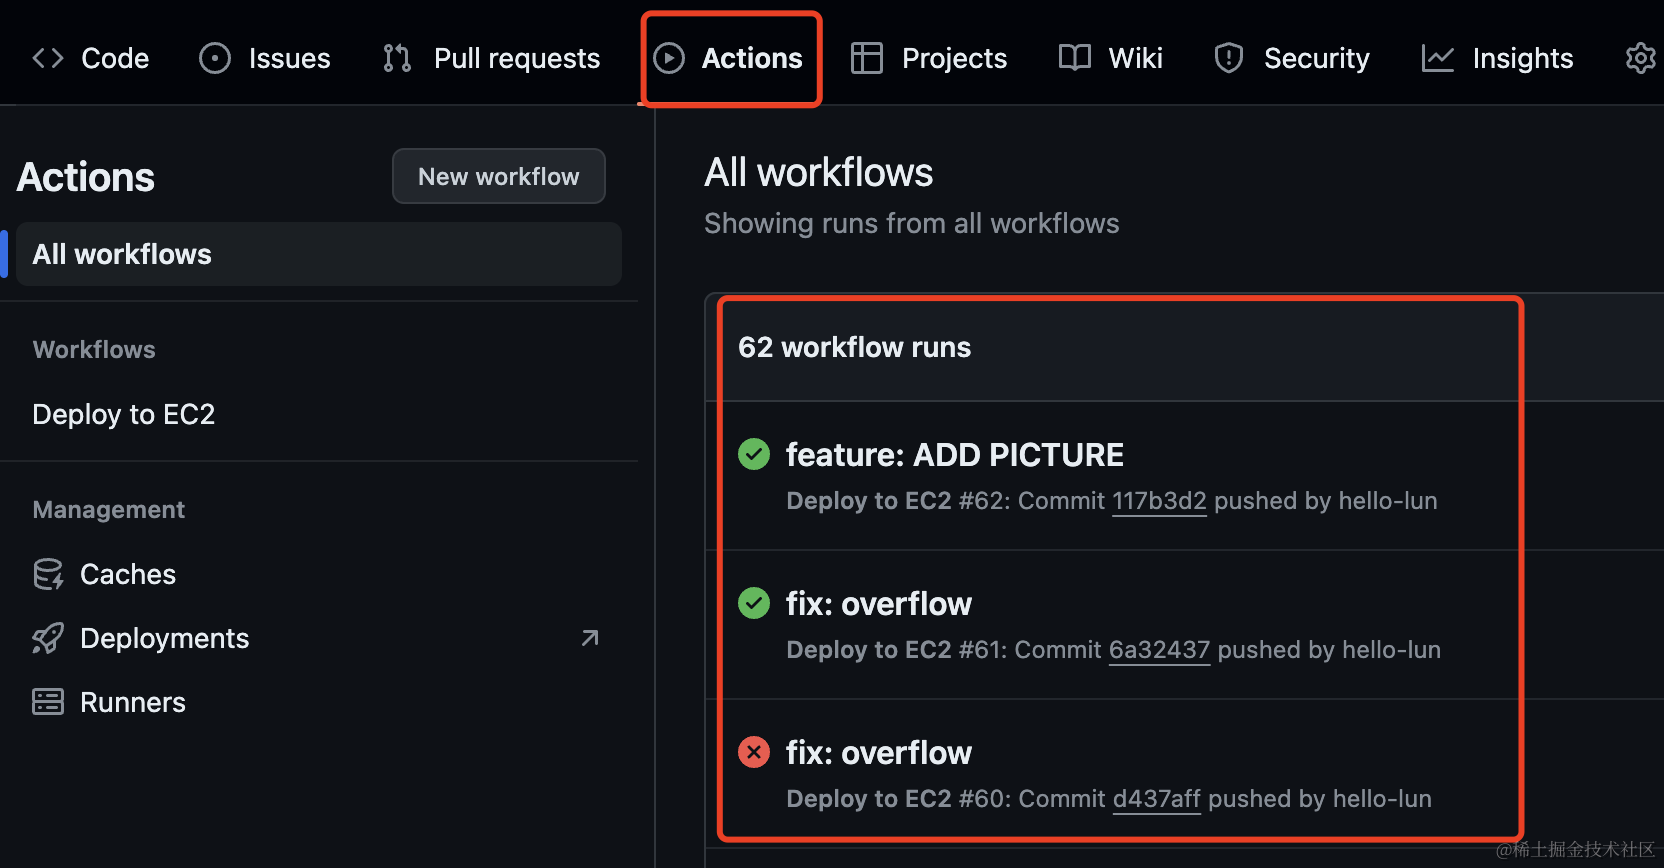
8、check your actions